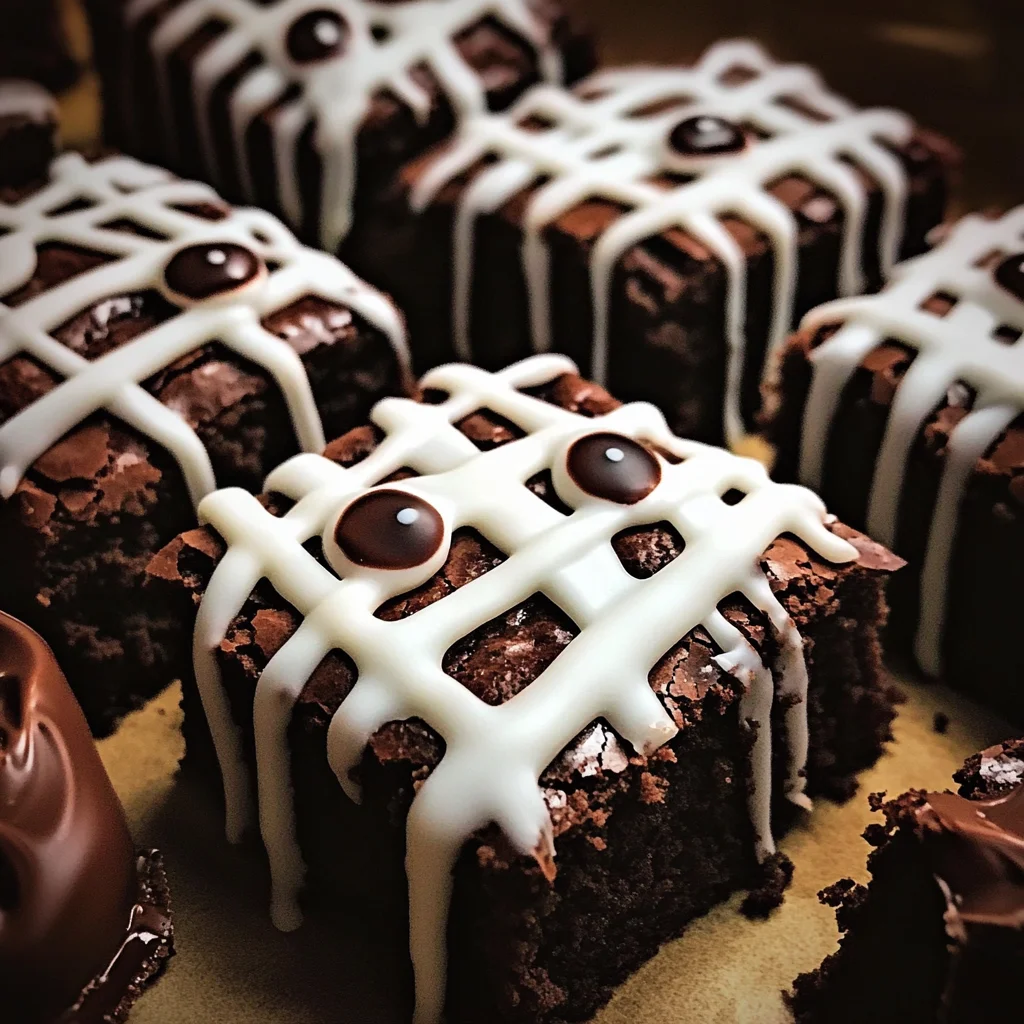
spooky mummy brownies
If you’re looking for a fun and delicious treat to celebrate Halloween, these spooky mummy brownies are just the thing! They’re not only adorable but also incredibly tasty, making them a hit at any gathering or family night. With rich chocolate flavor and a playful design, these brownies will surely bring smiles to faces of all ages. Perfect for busy weeknights or festive parties, you’ll love how easy they are to whip up!
Why You’ll Love This Recipe
- Cute and Creative: These spooky mummy brownies are too cute to resist, making them a fun project for kids and adults alike.
- Deliciously Rich: With layers of chocolate goodness, every bite is a delight that satisfies your sweet tooth.
- Family-Friendly Fun: Get everyone involved in the decorating process—it’s a great way to bond while baking!
- Make-Ahead Magic: You can prepare these brownies ahead of time and store them for later enjoyment.

Ingredients You’ll Need
Making these spooky mummy brownies is easier than you might think! You’ll find that the ingredients are simple and wholesome, ensuring that each bite is not just fun but also delicious.
- 10 tbsp butter
- 1 1/2 cups dark chocolate chips or chunks
- 1 cup sugar
- 1/4 cup dark brown sugar
- 3 eggs, at room temperature
- 1 tsp espresso powder (optional)
- 2 tsp vanilla extract
- 3/4 cup all-purpose flour
- 1/3 cup unsweetened cocoa powder
- 1/2 tsp baking powder
- 1/2 tsp kosher salt
- 1 package candy eyes
- 20 oz semi-sweet or milk chocolate chips
- 1 tbsp coconut oil
- 1 cup powdered sugar
- 2-3 tbsp heavy cream, to thin
Variations
This recipe is wonderfully flexible! Feel free to get creative with these variation ideas:
- Add Some Crunch: Consider mixing in some chopped nuts or crushed pretzels for an added crunch in your brownie batter.
- Mix Up the Chocolate: Use white chocolate chips instead of dark for a sweeter twist.
- Flavored Icing: Try adding a drop of peppermint or orange extract to your icing for an extra burst of flavor.
- Decorative Toppings: Instead of candy eyes, use colorful sprinkles or edible glitter to give your mummies a unique look!
How to Make spooky mummy brownies
Step 1: Preheat the Oven
Preheat your oven to 350 degrees Fahrenheit. This step is crucial because starting with a hot oven ensures your brownies will bake evenly and rise beautifully.
Step 2: Melt the Chocolate
In a microwave-safe bowl, heat the butter and one cup of chocolate chips together for one minute. Stir until everything melts smoothly. This step releases rich flavors into the mixture and creates that deliciously gooey texture we all love in brownies.
Step 3: Whisk Together Eggs and Sugars
In the bowl of a stand mixer, beat the eggs vigorously until frothy—about two to three minutes. Gradually add in the melted chocolate mixture while mixing until smooth. The air incorporated during this process helps create light and tender brownies.
Step 4: Combine Dry Ingredients
Add flour, cocoa powder, baking powder, and salt to the chocolate mixture. Beat gently until just combined; overmixing can lead to tough brownies. Finally, fold in the remaining chocolate chips for those delightful chunks throughout!
Step 5: Bake Your Brownies
Spread the batter evenly into your prepared baking pan and bake for about 25–30 minutes. A toothpick should come out with just a few moist crumbs attached—this means they’re perfectly fudgy!
Step 6: Prepare Your Chocolate Coating
While your brownies cool, melt more chocolate with coconut oil in a large microwave-safe bowl. Heat it until smooth; this coating will add another layer of decadence to our spooky mummies.
Step 7: Coat the Brownies
Once cooled slightly, dip each brownie into the melted chocolate coat completely. Let any excess drip off before placing them on parchment paper. This step not only enhances flavor but also gives our mummies their signature look!
Step 8: Make Bandage Icing
Whisk powdered sugar with heavy cream until it reaches a thick consistency. This icing will act as our “bandages.” Transfer it into a piping bag or ziptop bag with one corner snipped off for easy decorating.
Step 9: Decorate Your Mummies
Draw crisscross patterns on each brownie using your bandage icing, then place candy eyes on top while it’s still wet. Allow everything to harden for about ten minutes before serving.
Enjoy every spooky bite of these delightful mummy brownies—they’re sure to be a favorite at any Halloween celebration!
Pro Tips for Making spooky mummy brownies
Making spooky mummy brownies is a fun and creative process, and these tips will help you achieve the best results!
- Use high-quality chocolate: Choosing premium dark or semi-sweet chocolate chips enhances the flavor of your brownies, making them rich and decadent.
- Don’t overbake: Keep an eye on your brownies while they’re in the oven. Overbaking can lead to dry brownies; aim for a toothpick that comes out with moist crumbs for the perfect fudgy texture.
- Let them cool completely: Allowing your brownies to cool thoroughly helps set their structure, making them easier to dip in chocolate and decorate without falling apart.
- Experiment with icing designs: While this recipe features classic bandages, feel free to get creative with different patterns or even add spooky decorations like sprinkles or candy!
- Store properly: If you have leftovers (which I doubt!), store the brownies in an airtight container at room temperature for up to three days or in the fridge for up to a week to maintain their freshness.
How to Serve spooky mummy brownies
These cute brownie mummies are perfect for Halloween parties, school events, or just a fun treat at home! Here are some ideas on how to present your delicious creations.
Garnishes
- Sprinkles: Adding Halloween-themed sprinkles can add a festive touch that makes your brownies even more enticing.
- Crushed candy corn: This adds a nice crunch and a pop of color that contrasts beautifully against the chocolate.
- Whipped coconut cream: A dollop of this dairy-free cream can add lightness and balance out the richness of the brownies.
Side Dishes
- Vanilla ice cream: The creamy texture of vanilla ice cream pairs perfectly with fudgy brownies, creating a delightful contrast.
- Fresh fruit salad: A refreshing mix of fruits adds brightness and balances out the sweetness of the brownies. Consider including seasonal fruits like apples and pears for a fall touch.
- Hot cocoa: Serve alongside warm mugs of hot cocoa for those chilly evenings—it’s a cozy combination that everyone will love!
- Pumpkin spice latte: For adults (or older kids), pairing these brownies with pumpkin spice lattes can elevate your dessert experience into something truly special for fall gatherings.
Enjoy serving up these adorable spooky mummy brownies at your next gathering! They’re sure to be a hit!
Make Ahead and Storage
These spooky mummy brownies are perfect for meal prep! You can make them ahead of time for parties, gatherings, or just to satisfy your sweet cravings throughout the week. Here’s how to store and enjoy them later.
Storing Leftovers
- Store brownies in an airtight container at room temperature for up to 3 days.
- For longer freshness, place them in the refrigerator where they can last up to a week.
- Always allow the brownies to cool completely before sealing them in a container.
Freezing
- Cut the brownies into squares before freezing for easy access.
- Wrap each brownie tightly in plastic wrap and place them in a freezer-safe bag.
- They will keep well for up to 3 months. Just remember to label the bag with the date!
Reheating
- To enjoy your brownies warm, preheat your oven to 350°F (175°C).
- Place the brownies on a baking sheet and cover loosely with aluminum foil.
- Heat for about 10-15 minutes or until warmed through. Enjoy that gooey goodness all over again!
FAQs
Here are some common questions about making spooky mummy brownies!
Can I use different types of chocolate chips for spooky mummy brownies?
Absolutely! Feel free to experiment with semi-sweet, dark, or even milk chocolate chips based on your preference. Each will give a slightly different flavor but remain delicious!
How do I make spooky mummy brownies gluten-free?
You can easily substitute all-purpose flour with a gluten-free flour blend. Just ensure that it measures cup-for-cup like regular flour, and you’ll have a fantastic gluten-free treat!
Can I decorate spooky mummy brownies differently?
Of course! Get creative with your icing designs or use various candies instead of candy eyes. Your imagination is the limit when it comes to decorating these fun treats!
How long does it take to make spooky mummy brownies?
The total time is about 90 minutes, including preparation and cooling time. It’s worth every minute for these adorable Halloween delights!
Final Thoughts
I hope you’re as excited as I am about making these spooky mummy brownies! They not only bring festive cheer but are also completely delicious and fun to decorate. Perfect for gatherings or just as a treat to brighten your day. Enjoy every moment of baking and indulging – happy Halloween baking!
Spooky Mummy Brownies

Get ready to whip up a batch of delightful spooky mummy brownies that are sure to be the highlight of your Halloween festivities! These chocolatey treats combine rich flavors with an adorable design, making them perfect for gatherings or family nights. With their fudgy texture and playful decorations, these brownies will surely bring smiles to faces of all ages. Plus, they’re simple to make, allowing everyone to join in on the fun!
- Prep Time: 20 minutes
- Cook Time: 30 minutes
- Total Time: 50 minutes
- Yield: 12 servings 1x
- Category: Dessert
- Method: Baking
- Cuisine: American
Ingredients
- 10 tbsp butter
- 1 1/2 cups dark chocolate chips or chunks
- 1 cup sugar
- 1/4 cup dark brown sugar
- 3 eggs, at room temperature
- 1 tsp espresso powder (optional)
- 2 tsp vanilla extract
- 3/4 cup all-purpose flour
- 1/3 cup unsweetened cocoa powder
- 1/2 tsp baking powder
- 1/2 tsp kosher salt
- 1 package candy eyes
- 20 oz semi-sweet or milk chocolate chips
- 1 tbsp coconut oil
- 1 cup powdered sugar
- 2–3 tbsp heavy cream, to thin
Instructions
- Preheat your oven to 350°F (175°C).
- Melt butter and one cup of dark chocolate chips together in a microwave-safe bowl.
- In a stand mixer, beat eggs until frothy; then mix in the melted chocolate mixture.
- Combine flour, cocoa powder, baking powder, and salt into the chocolate mixture until just combined.
- Spread batter into a baking pan and bake for 25–30 minutes until a toothpick comes out with moist crumbs.
- Let brownies cool; meanwhile, melt more chocolate with coconut oil for coating.
- Dip each brownie into the melted chocolate and let excess drip off.
- Prepare icing by whisking powdered sugar with heavy cream, then pipe onto brownies as 'bandages' and add candy eyes.
Nutrition
- Serving Size: 1 brownie (50g)
- Calories: 230
- Sugar: 20g
- Sodium: 85mg
- Fat: 12g
- Saturated Fat: 8g
- Unsaturated Fat: 4g
- Trans Fat: 0g
- Carbohydrates: 29g
- Fiber: 2g
- Protein: 3g
- Cholesterol: 40mg