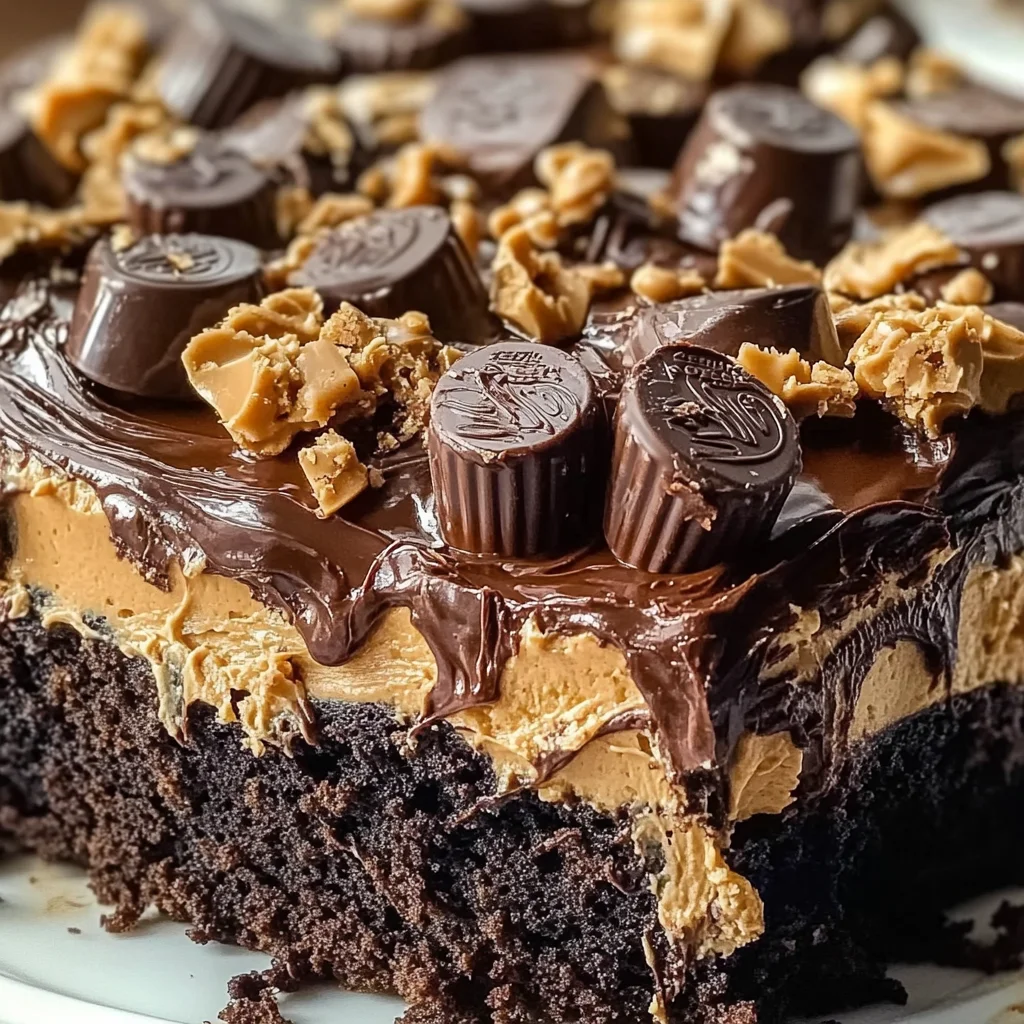
Reese’s Peanut Butter Earthquake Cake
If you’re looking for a show-stopping dessert that will make everyone gasp in delight, you’ve come to the right place! The Reese’s Peanut Butter Earthquake Cake is a family favorite in my house, and I can honestly say it’s one of those recipes that never fails to impress. With its rich chocolate cake base and that luscious peanut butter center, this cake is perfect for everything from busy weeknights to family gatherings or celebrations. It’s indulgent yet surprisingly easy to whip up!
Trust me, once you take that first bite of this gooey, chocolatey goodness topped with chopped Reese’s Cups, you’ll understand why it has earned a special spot in my heart.
Why You’ll Love This Recipe
- Quick and Easy: With just a box of cake mix and a few simple ingredients, you can have this delightful dessert ready in no time!
- Family-Friendly Flavor: Who doesn’t love the classic combination of chocolate and peanut butter? This cake is sure to please both kids and adults alike.
- Perfect for Any Occasion: Whether it’s a casual dinner or a festive celebration, this cake fits right in. It’s an instant crowd-pleaser!
- Make-Ahead Delight: You can prepare it ahead of time and serve it warm or at room temperature, making it great for meal prep.
- Rich and Indulgent: The layered gooey center offers an unexpected surprise that takes every bite over the top!
Ingredients You’ll Need
Let’s gather our simple, wholesome ingredients to create this amazing Reese’s Peanut Butter Earthquake Cake. These are all pantry staples that you might already have on hand!
Ingredients:
– 1 box chocolate cake mix
– 1 cup water
– 1/2 cup vegetable oil
– 3 large eggs
– 1 cup creamy peanut butter
– 8 oz cream cheese, softened
– 1/2 cup unsalted butter, melted
– 4 cups powdered sugar
– 1 tsp vanilla extract
– 1 cup Reese’s Peanut Butter Cups, chopped
Variations
One of the best things about the Reese’s Peanut Butter Earthquake Cake is its flexibility! Feel free to get creative with these fun variations:
- Add some crunch: Mix in some chopped nuts like walnuts or pecans for added texture.
- Go nut-free: Swap out peanut butter for sunflower seed butter if you’re avoiding nuts.
- Change the chocolate: Use a dark chocolate cake mix for a richer flavor profile.
- Top with frosting: Drizzle some chocolate ganache over the cooled cake for an extra layer of indulgence.
How to Make Reese’s Peanut Butter Earthquake Cake
Step 1: Preheat Your Oven
Start by preheating your oven to 350°F (175°C). This ensures a consistent baking temperature so your cake rises beautifully.
Step 2: Prepare the Baking Dish
Grease your 9×13-inch baking dish. This step is important because it prevents sticking and makes serving much simpler later on.
Step 3: Mix the Chocolate Cake Batter
In a large bowl, combine the chocolate cake mix, water, vegetable oil, and eggs. Stir until everything is well mixed. Pour this delicious batter into your prepared baking dish; it’s going to be the perfect base for our earthquake cake!
Step 4: Create the Peanut Butter Swirl
In another bowl, blend together the creamy peanut butter, softened cream cheese, melted butter, powdered sugar, and vanilla extract until smooth. Drop spoonfuls of this mixture over your cake batter. Now comes the fun part! Use a knife to gently swirl it into the batter—this creates those delightful gooey layers.
Step 5: Add the Tasty Topping
Sprinkle the chopped Reese’s Peanut Butter Cups evenly over the top of your batter. This not only adds flavor but also gives it that signature look we all love!
Step 6: Bake It Up
Place your baking dish in the preheated oven and bake for about 35-40 minutes. Keep an eye on it; you want a toothpick inserted into the center to come out mostly clean—this means it’s perfectly cooked!
Step 7: Cool and Serve
Once baked, let your cake cool slightly before diving in. You can enjoy it warm or let it reach room temperature—the choice is yours! Either way, every bite will be pure bliss.
And there you have it—a scrumptious Reese’s Peanut Butter Earthquake Cake that’s bound to be a hit at any gathering! Enjoy!
Pro Tips for Making Reese’s Peanut Butter Earthquake Cake
Baking this indulgent cake can be a delightful experience, and with a few simple tips, you can elevate your dessert game!
- Use Room Temperature Ingredients: Make sure your cream cheese and eggs are at room temperature. This ensures a smoother batter and helps the ingredients blend more easily, resulting in a lighter cake.
- Don’t Overmix the Batter: When combining the cake ingredients, mix just until they are incorporated. Overmixing can lead to a dense cake, so keep it gentle to achieve that perfect, fluffy texture.
- Swirl Carefully: When swirling the peanut butter mixture into the chocolate batter, use a light hand. Too much mixing will blend the two layers too thoroughly, losing that beautiful layered effect.
- Adjust Baking Time Based on Your Oven: Ovens can vary widely in temperature accuracy. Start checking for doneness a few minutes early, as you want it to be moist but not underbaked.
- Cool Before Serving: Allow the cake to cool slightly before digging in. This helps set the gooey center while still keeping it warm and inviting for serving.
How to Serve Reese’s Peanut Butter Earthquake Cake
Presenting your Reese’s Peanut Butter Earthquake Cake is all about enhancing its visual appeal and creating an enjoyable eating experience. Here are some ways to make it extra special!
Garnishes
- Whipped Coconut Cream: A dollop of whipped coconut cream adds a light, airy touch that complements the rich flavors of the cake without overpowering it.
- Chocolate Drizzle: Drizzling melted chocolate over the top creates an eye-catching finish and intensifies the chocolatey goodness.
Side Dishes
- Vanilla Ice Cream: A scoop of vanilla ice cream is a classic pairing that balances the richness of the cake with its creamy texture and mild flavor.
- Fresh Berries: Serving fresh strawberries or raspberries on the side brings a burst of freshness and acidity that cuts through the sweetness of the cake.
- Coffee: A warm cup of coffee enhances dessert flavors beautifully. The bitterness of coffee contrasts nicely with sweet treats like this earthquake cake.
- Fruit Salad: A light fruit salad offers a refreshing contrast to the rich dessert, making for a well-rounded meal or gathering treat.
With these tips and serving suggestions, your Reese’s Peanut Butter Earthquake Cake will not only taste fantastic but also look stunning on any table! Enjoy every bite!

Make Ahead and Storage
This Reese’s Peanut Butter Earthquake Cake is a fantastic choice for meal prep, as it can be made ahead of time and stored effortlessly. It’s perfect for gatherings or simply to enjoy throughout the week!
Storing Leftovers
- Allow the cake to cool completely before storing.
- Cover the cake with plastic wrap or aluminum foil, or transfer it to an airtight container.
- Store in the refrigerator for up to 5 days.
Freezing
- Cool the cake completely, then slice it into individual portions.
- Wrap each slice tightly in plastic wrap, followed by aluminum foil to prevent freezer burn.
- Freeze for up to 3 months. For best quality, consume sooner rather than later!
Reheating
- To reheat individual slices, remove the plastic wrap and place on a microwave-safe plate.
- Microwave for about 20-30 seconds or until warmed through. Check periodically to avoid overheating.
- Alternatively, you can reheat slices in a preheated oven at 350°F (175°C) for about 10 minutes.
FAQs
Here are some common questions that might come up while making this delightful dessert:
Can I use a different type of cake mix for Reese’s Peanut Butter Earthquake Cake?
Absolutely! While chocolate cake mix enhances the peanut butter flavor beautifully, you can experiment with vanilla or even red velvet cake mixes for a unique twist.
How do I know when my Reese’s Peanut Butter Earthquake Cake is done baking?
The cake is done when a toothpick inserted into the center comes out mostly clean with just a few moist crumbs attached. Keep an eye on the baking time as ovens may vary!
Can I make Reese’s Peanut Butter Earthquake Cake ahead of time?
Yes! This cake is excellent for making ahead. Simply store it as instructed after it has cooled.
Final Thoughts
I hope you’re as excited about making this Reese’s Peanut Butter Earthquake Cake as I am! It’s truly a delightful dessert that combines rich chocolate and creamy peanut butter in every bite. Whether you’re sharing it with friends or indulging by yourself, this cake is sure to bring smiles all around. Happy baking, and enjoy every scrumptious piece!
Reese’s Peanut Butter Earthquake Cake

Indulge in the delightful decadence of Reese’s Peanut Butter Earthquake Cake, a dessert that brings together the irresistible combination of rich chocolate cake and luscious peanut butter. This show-stopping treat is perfect for any occasion, from family gatherings to casual dinners. With just a few simple ingredients, you can whip up this gooey, layered cake that features a creamy peanut butter center topped with chopped Reese’s Cups. Easy to prepare and even easier to enjoy, this cake will leave everyone asking for seconds. Treat yourself and your loved ones to this comforting sweet that promises to impress!
- Prep Time: 15 minutes
- Cook Time: 40 minutes
- Total Time: 55 minutes
- Yield: Serves approximately 12 slices 1x
- Category: Dessert
- Method: Baking
- Cuisine: American
Ingredients
- 1 box chocolate cake mix
- 1 cup water
- 1/2 cup vegetable oil
- 3 large eggs
- 1 cup creamy peanut butter
- 8 oz cream cheese, softened
- 1/2 cup unsalted butter, melted
- 4 cups powdered sugar
- 1 tsp vanilla extract
- 1 cup chopped peanut butter cups
Instructions
- Preheat your oven to 350°F (175°C) and grease a 9×13-inch baking dish.
- In a large bowl, mix the chocolate cake mix, water, vegetable oil, and eggs until well combined. Pour into the prepared dish.
- In another bowl, blend creamy peanut butter, softened cream cheese, melted butter, powdered sugar, and vanilla until smooth. Drop spoonfuls over the cake batter and swirl gently with a knife.
- Sprinkle chopped peanut butter cups over the top.
- Bake for 35-40 minutes or until a toothpick inserted comes out mostly clean.
- Allow to cool slightly before serving warm or at room temperature.
Nutrition
- Serving Size: 1 slice (100g)
- Calories: 410
- Sugar: 45g
- Sodium: 320mg
- Fat: 23g
- Saturated Fat: 10g
- Unsaturated Fat: 11g
- Trans Fat: 0g
- Carbohydrates: 47g
- Fiber: 2g
- Protein: 6g
- Cholesterol: 80mg